


In stock | Ready to Ship
Averixan Downlight
What You’ll Love:
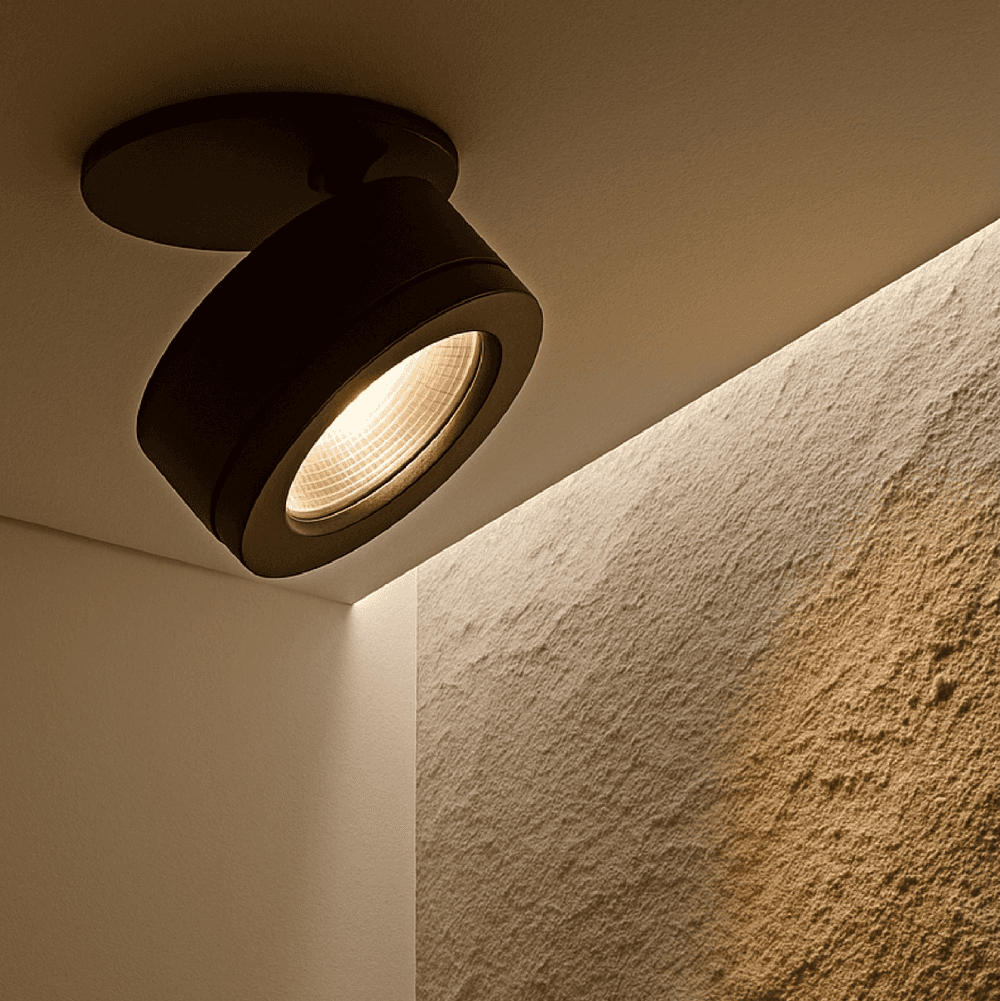
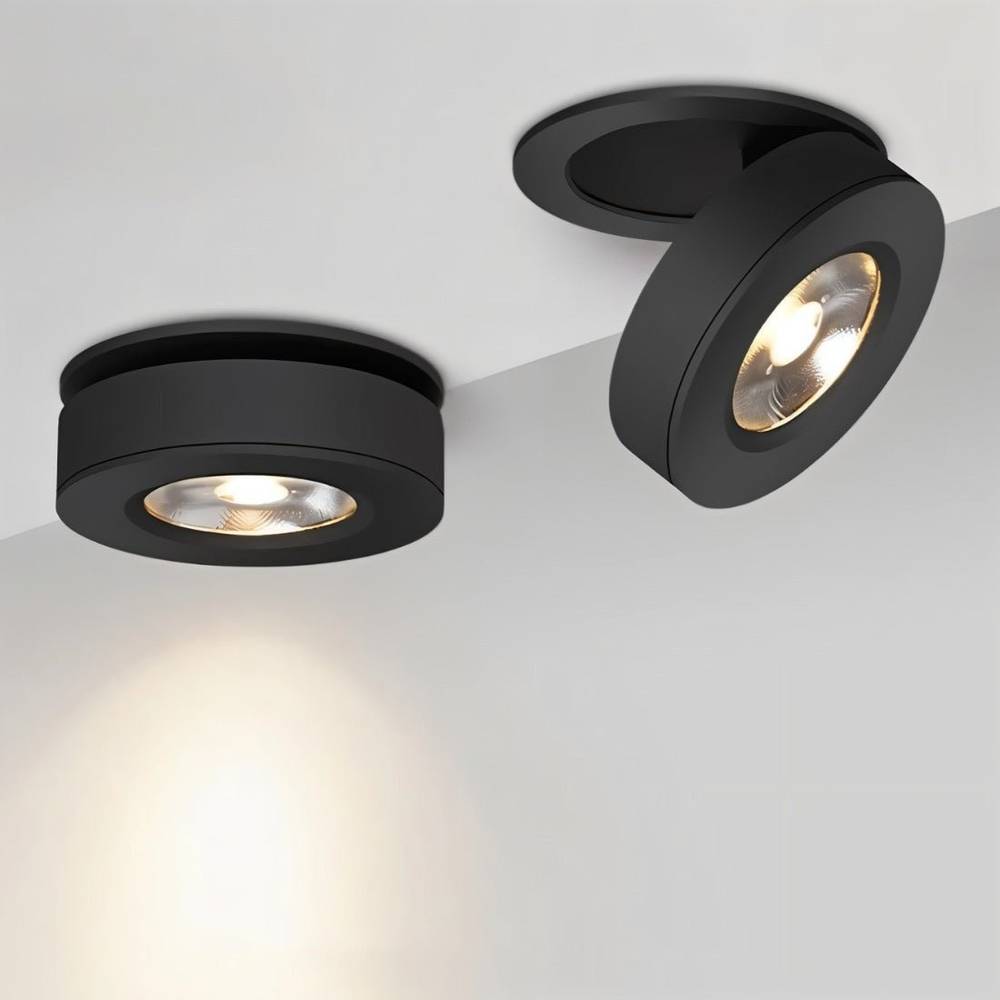
⭕ 360° Adjustable Precision: Fully rotatable spotlight allows exact light placement for artwork, displays, or layered room lighting. Designed for complete directional control
🛡️ Durable Aluminium Build: High-quality construction ensures strength and longevity, with an extended lifespan for reduced maintenance
✨ Industrial Recessed Profile: Clean, foldable design installs flush into ceilings, delivering bright, even illumination with a refined modern edge
Description
The Averixan Downlight introduces an industrial-inspired edge to modern interiors, crafted from high-quality aluminium for strength and longevity. Its refined spotlight form integrates cleanly into ceilings, delivering a focused architectural presence suited to both residential and commercial environments.
Engineered with a 360-degree rotatable design, Averixan allows precise directional lighting for accent or task illumination. Designed for recessed installation with a compact, foldable structure, it offers efficient 3–12W LED performance rated for over 50,000 hours, ensuring bright, even light with lasting reliability.
- Weights & Dimensions
D3.3", 0.47lbs (0.215kg)
D3.9", 0.47lbs (0.215kg)
D3.9", 0.47lbs (0.215kg) - Wattage (Lumens): 7W (770lm), 10W (1100lm), 12W (1320lm)
- Material: Aluminum
- Finish: Black, White
- Light Source: Integrated LED
- Dimmable: Upon Request
- Voltage: 90-260VAC
- Installation Type: Hardwired
- Certifications: UL, CCC, CE, CQC, EMC, FCC, GS, LVD, PSE, ROHS, SAA, VDE
NOTE
1 in = 2.54 cm; 1 cm = 0.39 in
Details
Mounting Types: Downlights are available in trimless, recessed, semi-recessed, surface-mounted, and track-mounted formats. Always confirm the mounting type listed on the product page before installation.
Ceiling Compatibility: Most models are designed for drywall ceilings. Select models may also support concrete or drop ceilings—refer to technical specifications for confirmation.
Dimming: Many designs support dimming when paired with compatible drivers and wall dimmers.
Power Source: All models are hardwired and connect directly to a ceiling electrical junction.
Trim Integration: Trimless downlights may require professional drywall finishing for a seamless, flush appearance.
Track Compatibility: Track-mounted fixtures must be installed on compatible rail systems. Refer to product specifications for track type.
Tools You May Need
- Drill
- Keyhole or drywall saw (for recessed or trimless installations)
- Screwdriver
- Voltage tester
- Wire stripper
- Wire nuts (included with most fixtures)
- Screws and wall anchors (for surface-mounted installations)
- Level
- Measuring tape or pencil
Installation Steps
Step 1: Turn Off Power
Turn off power at the breaker panel and use a voltage tester to confirm the circuit is completely off before beginning installation.
Step 2: Prepare the Ceiling Opening (Recessed & Trimless Only)
If a ceiling cutout is required, use the provided template to mark the opening. Carefully cut using a drywall saw or hole cutter. Trimless models may require additional depth and framing for proper installation.
Step 3: Install Mounting Hardware or Fixture Housing
- Recessed and trimless fixtures: Insert the housing into the ceiling cavity and secure using spring clips or fasteners. Trimless models may require joist framing for support.
- Semi-recessed fixtures: Partially recess into the ceiling and secure according to included instructions.
- Surface-mounted fixtures: Attach directly to the ceiling or junction box using screws and wall anchors.
- Track-mounted fixtures: Install the compatible track system first, then lock the fixture into place on the rail.
Step 4: Connect the Wiring
Match the fixture wires to the ceiling wires:
- Black to black (live)
- White to white (neutral)
- Green or bare wire to ground
- Secure all connections with wire nuts and neatly tuck the wiring into the housing or junction box.
Step 5: Final Assembly
Trimless fixtures must be mudded and feathered into the ceiling surface before final painting. Recessed, semi-recessed, and surface-mounted fixtures are completed by snapping or twisting the trim or body into place. Track fixtures can be adjusted and rotated along the rail after installation.
Step 6: Restore Power and Test
Restore power at the breaker panel and test the fixture using the wall switch or dimmer to ensure proper operation.
Important Tips
- Professional installation is recommended for trimless or recessed fixtures, especially when drywall finishing or insulation is involved.
- Always follow local electrical codes and regulations.
- Use only compatible drivers and dimmers specified for the fixture.
- Maintain safe spacing from insulation to prevent overheating.
- Order Handling Time:
1–3 business days
- Transit Time:
14–22 business days after order placement
- Estimated Delivery Time:
15–25 business days
For full details, please refer to our Shipping Policy
We offer a 30-day return window. Simply contact our support team info@solincollective.com to initiate a return.
Claims submitted after this period may not be eligible for a refund or replacement.
Choose options
Safe payment on our website
Averixan Downlight
Frequently Asked Questions
Professional installation is recommended to ensure safe wiring and proper setup.
It operates within a 3–12W range and is designed for efficient performance. The LED lifespan is rated at over 50,000 hours, reducing the need for frequent replacement.
It is constructed from aluminium, supporting durability and heat management.
The integrated LED module is rated for over 50,000 hours of operation.
Yes. The necessary mounting hardware is included for installation.


