


In stock | Ready to Ship
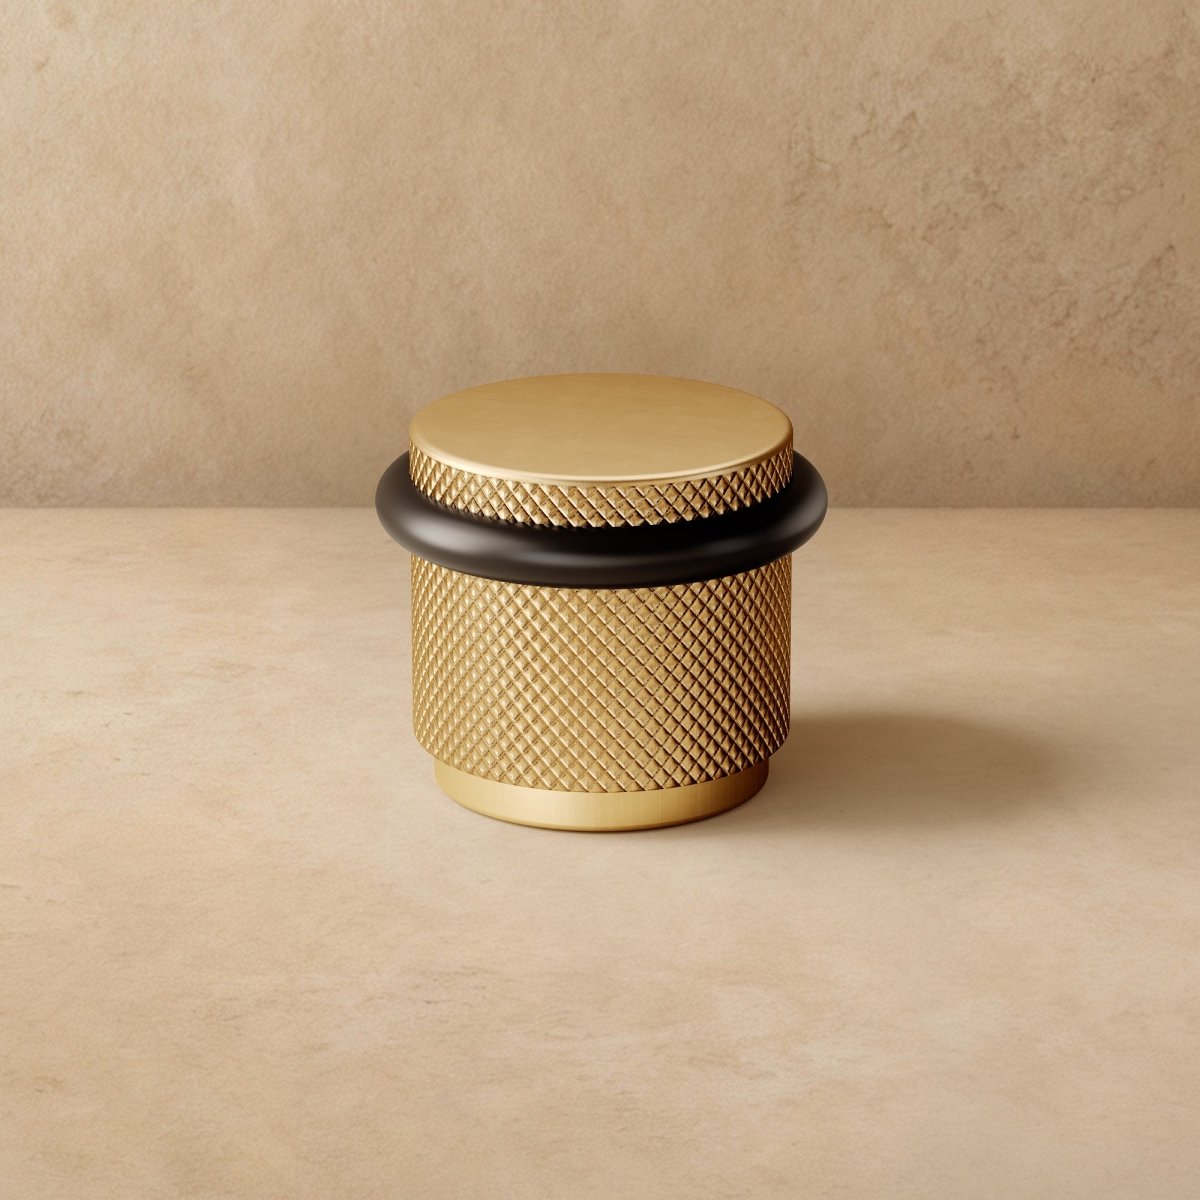
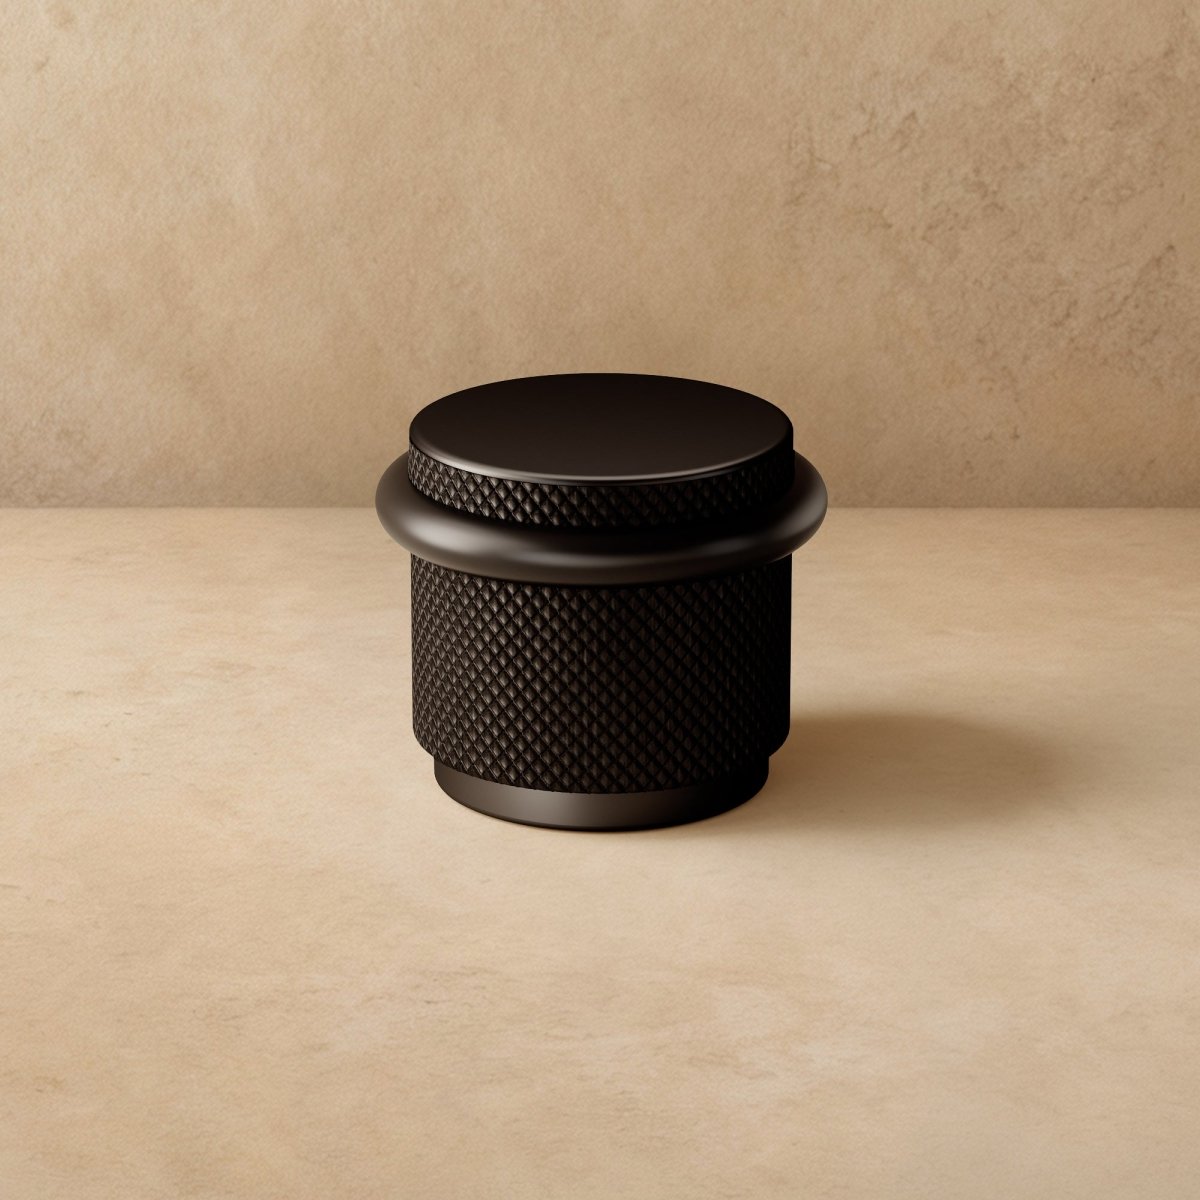
Kelvorn Door Stop
What You’ll Love:
⭕ Refined Protective Design: A clean, floor-mounted silhouette blends seamlessly into modern interiors while preventing wall damage from impact
🛡️ Solid Brass Stability: Crafted from robust brass for lasting durability and dependable performance over time
🖤 Quiet Impact Absorption: Rubber exterior softens contact and reduces noise, creating a calmer, more considered space
Description
The Kelvorn Door Stop is crafted from robust brass and designed with a stable floor-mounted form that balances durability with refined simplicity. Its clean profile introduces a subtle architectural accent while offering dependable wall protection.
Designed with a rubber exterior to absorb impact and reduce noise, Kelvorn prevents door slams and surface damage with ease. Available in four finishes, it integrates seamlessly across varied interior styles, delivering practical performance with a composed, design-led presence.
- Weights & Dimensions
D1.4" x H1.1", 0.44lbs (0.2kg) - Material: Brass
- Finish: Brass, Black, Bronze, Nickel
- Installation: Floor Mounted
- Application: For Interior Use
NOTE
1 in = 2.54 cm; 1 cm = 0.39 in
Details
Mounting Type:
Designed for surface installation on doors, drawers, or cabinetry. Refer to your product’s dimensions for proper placement and drilling points.
Tools You May Need
- Screwdriver (Phillips and flathead)
- Drill and drill bits
- Allen key
- Tape measure and pencil
- Level
- Chisel (for mortice lock installation)
- Screws and anchors
- Safety goggles
A. Cabinet Hardware
(Pull Bars, Knobs, Drawer Pulls)
Step 1: Mark Drilling Points Use a measuring tape and pencil to mark hole placements. For uniformity across multiple pieces, a template is recommended.
Step 2: Drill Holes Drill through the surface using a bit that matches the provided screw diameter. Keep the drill straight to avoid angle misalignment.
Step 3: Mount the Hardware Insert screws from the inside of the cabinet or drawer. Secure the hardware on the front face and tighten with a screwdriver — avoid over tightening.
Step 4: Align and Inspect Confirm straightness and spacing before fully securing.
B. Door Handle Hardware
B1: Thumb Lock or Dummy Handle
Step 1: Confirm Orientation Determine left-hand or right-hand door swing. Adjust handle orientation as needed.
Step 2: Mark Installation Height Mark desired height (typically 36–38 inches from the floor to the handle center). Align the mounting plate accordingly.
Step 3: Drill and Attach Drill pilot holes and secure the backplate and handle with the included screws. For dummy handles, install directly without latch mechanisms.
Step 4: Install Strike Plate (Thumb Lock Only) Mark latch location on the door frame. Chisel a recess if needed and screw the strike plate into place.
B2: Mortice Lock Handle
Step 1: Cut Mortice Pocket Using a chisel and drill, create a cavity in the door edge for the lock body. Use provided measurements for accuracy.
Step 2: Insert Lock Body Fit the lock body into the mortice cavity and attach it using screws through the faceplate.
Step 3: Install Handle Align the spindle through the lock and attach handles on both sides. Tighten using a screwdriver or included Allen key.
Step 4: Install Cylinder (If Applicable) Insert the key cylinder into the designated slot. Secure with the cylinder screw from the door edge.
Step 5: Mount Strike Plate Align with the latch mechanism and secure the strike plate to the door frame.
Important Tips
- Always double-check measurements before drilling.
- Use a level for consistent handle alignment across multiple units.
- If unfamiliar with mortice installation, consult a locksmith or professional.
- Ensure all moving parts operate smoothly before tightening screws.
- Dummy handles are for decorative or pull-only use — they do not engage latches or locks.
- Order Handling Time:
1–3 business days
- Transit Time:
14–22 business days after order placement
- Estimated Delivery Time:
15–25 business days
For full details, please refer to our Shipping Policy
We offer a 30-day return window. Simply contact our support team info@solincollective.com to initiate a return.
Claims submitted after this period may not be eligible for a refund or replacement.
Choose options
Safe payment on our website
Kelvorn Door Stop
Frequently Asked Questions
It is crafted from brass, offering durability and resistance to wear over time.
It is available in brass, black, bronze, and nickel finishes to coordinate with a range of interior palettes.
It acts as a buffer between the door and the wall, absorbing impact to prevent dents and surface damage.
Yes. A rubber exterior element helps minimize noise during door contact.
Yes. It is designed for floor mounting and can be installed using standard tools.