


In stock | Ready to Ship
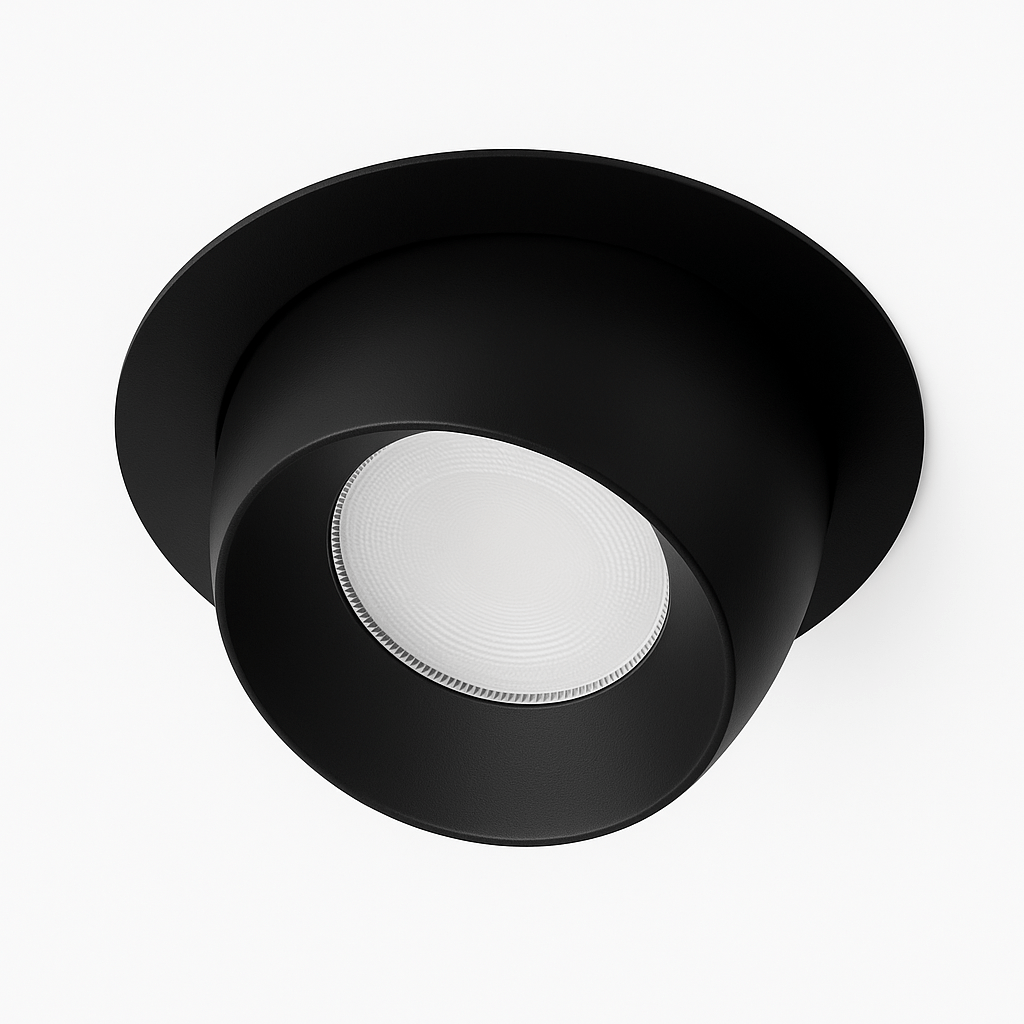
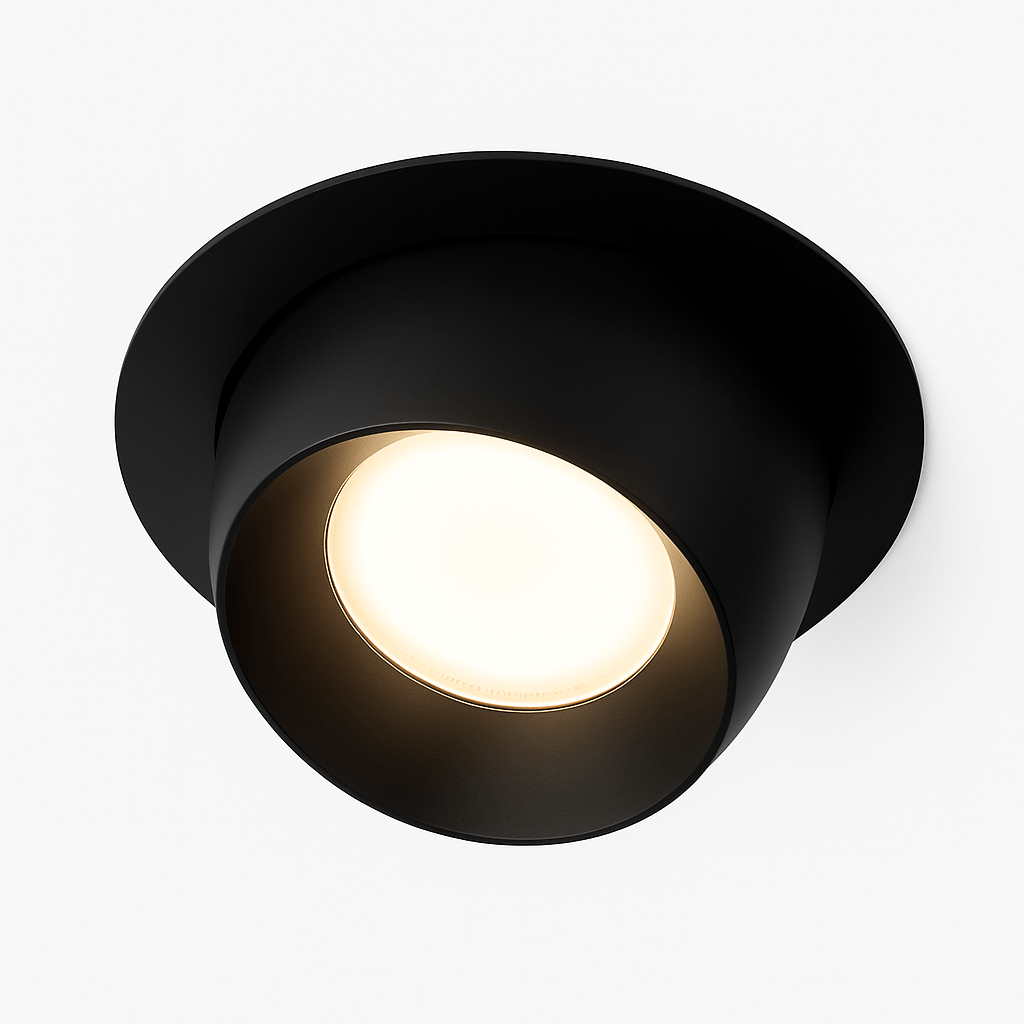
Lina Downlight
What You’ll Love:
💡 Fully Adjustable Direction: Smooth tilt and rotation allow precise control over focused lighting
⭕ Low-Profile Recessed Form: Integrates cleanly into ceilings for a refined, modern finish
🛡️ Durable Aluminium Build: Die-cast construction with a quality lens for long-lasting clarity
Description
The Lina Downlight is a low-profile recessed fixture designed for precise, adaptable illumination within modern interiors. Crafted from die-cast aluminium and finished with a PMMA lens, it offers durability and clear light diffusion while integrating seamlessly into the ceiling. With 90-degree tilt and full 360-degree rotation, Lina allows focused light to be directed exactly where it is needed.
Ideal for residential, retail, and hospitality spaces, Lina balances functional flexibility with a clean architectural presence. Available in two considered finishes, it supports a wide range of interior styles while delivering controlled, purposeful lighting for artwork, task areas, and design features.
- Weights & Dimensions:
D3.3"(8.5cm) x H2.7"(7cm) - Wattage (Lumens):
7W (770lm)
9W (990lm)
12W (1320lm)
15W (1650lm)
20W (2200lm) - Material: Aluminum
- Finish: Black, White
- Light Source: Integrated LED
- Bulb Included: Yes
- Dimmable: Yes (Optional)
- Voltage: 90–260VAC
- Installation Type: Hardwired
- Canopy/Backplate Dimensions: Cutout: D2.9"(7.6cm)
- Certifications: UL, CCC, CE, CQC, EMC, FCC, GS, LVD, PSE, ROHS, SAA, VDE
Details
Mounting Types: Downlights are available in trimless, recessed, semi-recessed, surface-mounted, and track-mounted formats. Always confirm the mounting type listed on the product page before installation.
Ceiling Compatibility: Most models are designed for drywall ceilings. Select models may also support concrete or drop ceilings—refer to technical specifications for confirmation.
Dimming: Many designs support dimming when paired with compatible drivers and wall dimmers.
Power Source: All models are hardwired and connect directly to a ceiling electrical junction.
Trim Integration: Trimless downlights may require professional drywall finishing for a seamless, flush appearance.
Track Compatibility: Track-mounted fixtures must be installed on compatible rail systems. Refer to product specifications for track type.
Tools You May Need
- Drill
- Keyhole or drywall saw (for recessed or trimless installations)
- Screwdriver
- Voltage tester
- Wire stripper
- Wire nuts (included with most fixtures)
- Screws and wall anchors (for surface-mounted installations)
- Level
- Measuring tape or pencil
Installation Steps
Step 1: Turn Off Power
Turn off power at the breaker panel and use a voltage tester to confirm the circuit is completely off before beginning installation.
Step 2: Prepare the Ceiling Opening (Recessed & Trimless Only)
If a ceiling cutout is required, use the provided template to mark the opening. Carefully cut using a drywall saw or hole cutter. Trimless models may require additional depth and framing for proper installation.
Step 3: Install Mounting Hardware or Fixture Housing
- Recessed and trimless fixtures: Insert the housing into the ceiling cavity and secure using spring clips or fasteners. Trimless models may require joist framing for support.
- Semi-recessed fixtures: Partially recess into the ceiling and secure according to included instructions.
- Surface-mounted fixtures: Attach directly to the ceiling or junction box using screws and wall anchors.
- Track-mounted fixtures: Install the compatible track system first, then lock the fixture into place on the rail.
Step 4: Connect the Wiring
Match the fixture wires to the ceiling wires:
- Black to black (live)
- White to white (neutral)
- Green or bare wire to ground
- Secure all connections with wire nuts and neatly tuck the wiring into the housing or junction box.
Step 5: Final Assembly
Trimless fixtures must be mudded and feathered into the ceiling surface before final painting. Recessed, semi-recessed, and surface-mounted fixtures are completed by snapping or twisting the trim or body into place. Track fixtures can be adjusted and rotated along the rail after installation.
Step 6: Restore Power and Test
Restore power at the breaker panel and test the fixture using the wall switch or dimmer to ensure proper operation.
Important Tips
- Professional installation is recommended for trimless or recessed fixtures, especially when drywall finishing or insulation is involved.
- Always follow local electrical codes and regulations.
- Use only compatible drivers and dimmers specified for the fixture.
- Maintain safe spacing from insulation to prevent overheating.
- Order Handling Time:
1–3 business days
- Transit Time:
14–22 business days after order placement
- Estimated Delivery Time:
15–25 business days
For full details, please refer to our Shipping Policy
We offer a 30-day return window. Simply contact our support team info@solincollective.com to initiate a return.
Claims submitted after this period may not be eligible for a refund or replacement.
Choose options
Safe payment on our website
Lina Downlight
Frequently Asked Questions
The Lina Downlight is available in both dimmable and non-dimmable versions.
It is constructed from die-cast aluminum and finished with a PMMA lens for durability and light diffusion.
The Lina Downlight operates within a 90–260VAC voltage range.
It features an integrated LED light source with a single bulb configuration.
The Lina Downlight is suitable for residential, retail, and hospitality environments.