


In stock | Ready to Ship
Orvex Ceiling Fan
What You’ll Love:
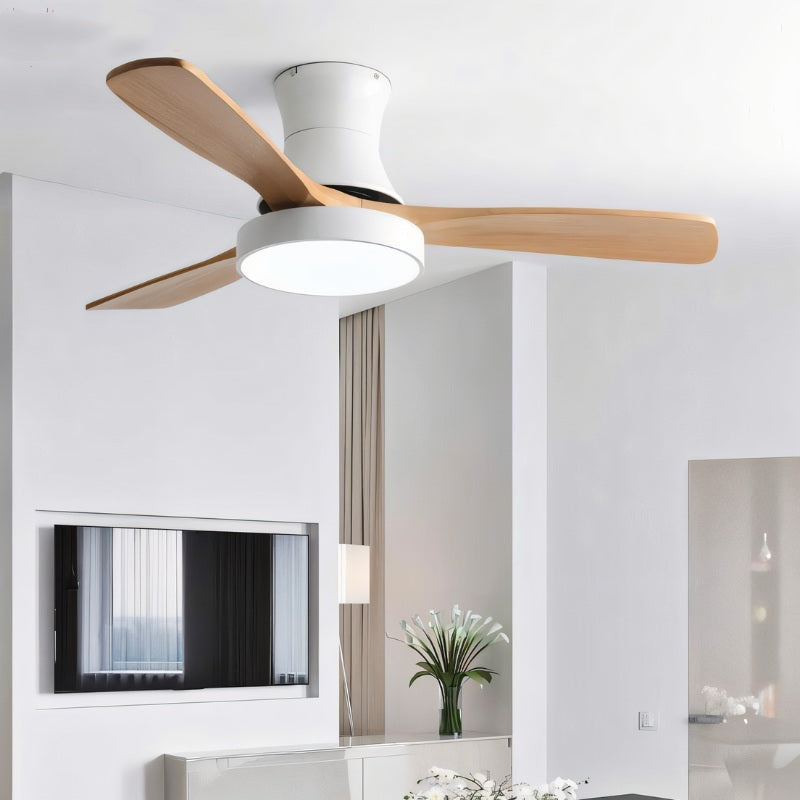
🌿 Refined Contemporary Design: Sculpted wooden blades and a clean silhouette create an elegant focal point. A balanced presence suited for living rooms, bedrooms, and studies
💡 Integrated Light & Cooling: Built-in LED illumination with adjustable tones pairs seamlessly with quiet airflow. A true 3-in-1 solution for comfort and ambiance
🛡️ Smooth, Reversible Performance: High-quality motor and reversing blades ensure efficient circulation year-round, controlled effortlessly by remote
Description
The Orvex Ceiling Fan is a contemporary composition that balances simplicity with distinctive character. Designed with three high-quality wooden blades and a refined glass lampshade, it introduces a calm architectural presence suited to living rooms, dining areas, studies, and bedrooms.
Engineered with integrated LED lighting and reversible airflow, Orvex delivers adaptable comfort throughout the year. The remote-controlled system allows adjustable fan speeds and three light modes—cold white, warm white, and neutral—offering energy-efficient cooling and tailored illumination within a cohesive 3-in-1 design.
- Weights & Dimensions
42" x 13.7", 17.6lbs (8kg)
48" x 16.9", 17.6lbs (8kg)
52" x 18.8", 17.6lbs (8kg) - Material: Wood, Iron, Acrylic
- Finish: Blue, Black, White
- Light Source: Integrated LED
- Dimmable: Yes (Through Remote Only)
- Voltage: 90-260VAC
- Installation Type: Hardwired
- Certifications: UL, CCC, CE, CQC, EMC, FCC, GS, LVD, PSE, ROHS, SAA, VDE
NOTE
1 in = 2.54 cm; 1 cm = 0.39 in
Details
Mounting Type: All flush mount ceiling lights are designed for direct installation onto a standard ceiling junction box. The fixture’s base rests closely against the ceiling, making it ideal for low-clearance areas.
Dimming: Most models with standard bulb sockets are dimmable. Integrated LED options are typically non-dimmable. For dimmer compatibility or questions, Contact Us.
Ceiling Type: Flush mounts are intended for flat ceilings only. For vaulted or sloped ceilings, consider semi-flush or pendant alternatives.
Power Source: All fixtures are hardwired and connect directly to your home’s electrical system.
Dimensions: Need exact fixture depth or canopy width? Our team is here to help — Contact Us.
Tools You May Need
- Screwdriver
- Voltage tester
- Wire stripper
- Wire nuts (included)
- Ladder
- Drill (if installing on a new junction box or non-standard ceiling)
Installation Steps
Step 1: Turn Off Power
Shut off the power to your ceiling light circuit at the breaker panel. Use a voltage tester to ensure the power is fully disconnected before continuing.
Step 2: Remove the Fixture Cover
Most flush mount lights include a removable outer shade or base cover. Carefully twist or unclip it to expose the mounting plate and wiring compartment.
Step 3: Install the Mounting Bracket
Attach the mounting bracket (included with your fixture) to the ceiling junction box using the supplied screws. Ensure it’s secure and aligned.
Step 4: Connect the Wiring
Match the fixture’s wires with the wires from your ceiling:
- Black (live/hot) to black
- White (neutral) to white
- Green or bare (ground) to the house ground wire or ground screw
Secure the connections with wire nuts, and gently tuck the wires into the junction box.
Step 5: Attach the Fixture Base
Lift the fixture base into place and align it with the mounting bracket. Secure it with the provided screws, ensuring it sits flush and evenly against the ceiling.
Step 6: Reattach the Cover
Once the base is mounted, reattach the decorative cover or diffuser according to the fixture’s design. This may involve twisting, clipping, or securing it with small fasteners.
Step 7: Restore Power and Test
Return to the breaker panel and turn the power back on. Use your wall switch to confirm that the fixture is functioning properly.
Important Tips
- Ideal for standard or low ceilings, perfect for hallways, bedrooms, and closets.
- Always confirm that your ceiling junction box can support the fixture’s weight.
- Follow local electrical codes and safety guidelines during installation.
- When in doubt, consult a licensed electrician.
- Order Handling Time:
1–3 business days
- Transit Time:
14–22 business days after order placement
- Estimated Delivery Time:
15–25 business days
For full details, please refer to our Shipping Policy
We offer a 30-day return window. Simply contact our support team info@solincollective.com to initiate a return.
Claims submitted after this period may not be eligible for a refund or replacement.
Choose options
Safe payment on our website
Orvex Ceiling Fan
Frequently Asked Questions
It features an energy-saving LED light and a high-quality motor designed to optimize airflow while minimizing power consumption.
Yes. A remote control is included, allowing adjustment of fan speed and lighting.
Yes. The mounting bracket supports installation on sloped ceilings. Professional installation is recommended.
The blade direction can be reversed using the remote control, allowing seasonal adjustment of airflow.
It includes three LED light modes: cold white, warm white, and neutral light.


