


In stock | Ready to Ship
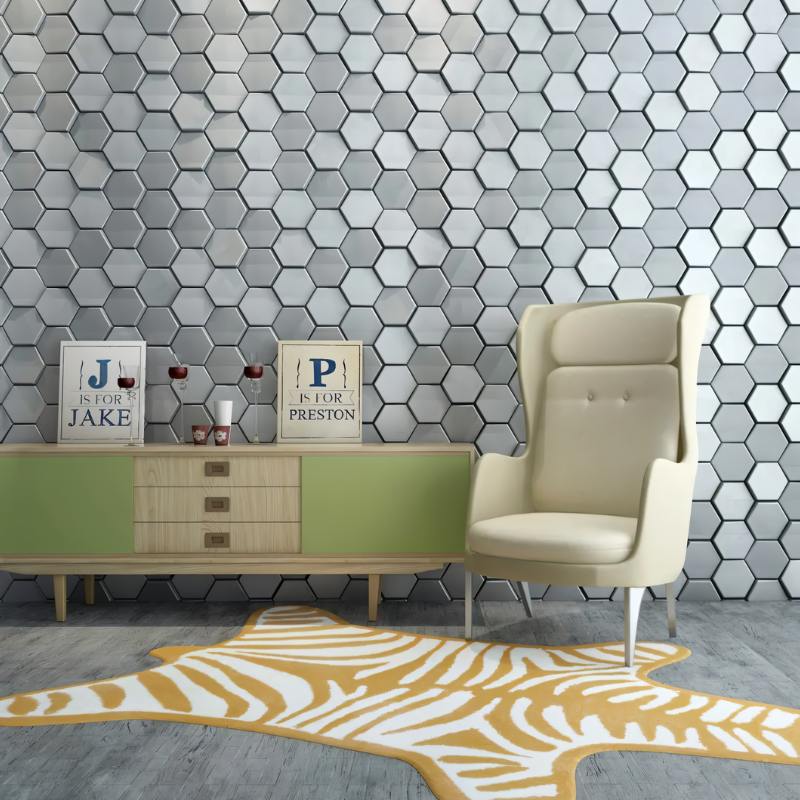
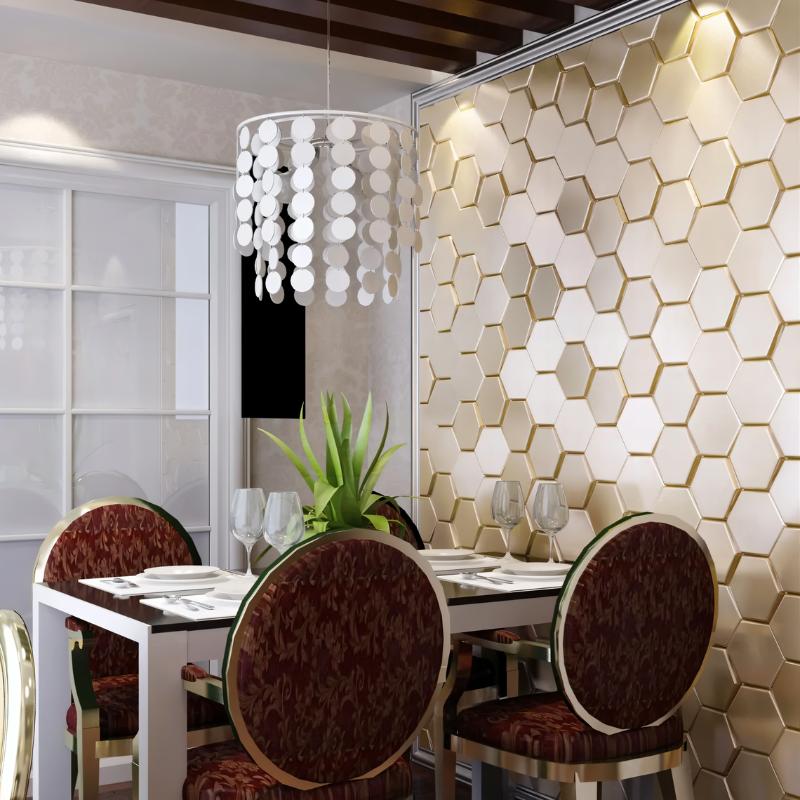
Velo Wall Panel
What You’ll Love:
✨ Metallic Faux Leather Finish: Refined gold and silver tones introduce subtle luxury with a soft, tactile presence
⭕ Modular Hexagon Design: Geometric panels allow flexible layouts and sculptural wall compositions
🛡️ Durable, Easy Care Surface: Designed to maintain its polished look with simple, effortless upkeep
Description
The Velo Wall Panel is a decorative wall surface designed to introduce refined texture and contemporary elegance through a hexagonal form. Finished in faux leather with a subtle sheen, the panel creates a distinctive visual rhythm while offering a polished, modern accent for interior walls.
Suitable for residential and commercial spaces, Velo enhances feature areas with its sculptural geometry and metallic tones. Its modular design allows for creative layouts, delivering a balance of durability, visual impact, and effortless maintenance within modern interior settings.
- Dimensions
L9" - Material: Leather
- Finish: Gold, Silver
- Area: Living Room, Bedroom, Dining Room, Office
NOTE
1 in = 2.54 cm; 1 cm = 0.39 in
General Preparation (For All Installation Types)
Before beginning installation:
- Ensure walls are clean, dry, and smooth
- Remove dust, grease, nails, and flaky paint
- Measure and mark your starting line using a level and pencil
- Lay panels on the floor first to visualize placement and pattern
Recommended Tools
- Tape Measure
- Level
- Pencil or Chalk Line
- Utility Knife or Fine-Tooth Saw
- Clean Cloth
- Caulk Gun (for adhesive installation)
- Rubber Roller (for peel-and-stick panels)
- Brad Nail Gun (for nail installation)
Nail Gun Installation
Ideal for: Thicker or heavier panels (wood, MDF)
Requires: Brad nail gun or finish nailer
Step-by-Step
- Locate wall studs using a stud finder and mark their positions.
- Start at the bottom corner of the wall.
- Align the first panel to your guideline.
- Fasten the panel into studs using a brad nail gun
Space nails every 12–16 inches - Fit subsequent panels tightly and continue fastening.
- Fill nail holes with wood filler or color-matched putty.
- Optional: Apply caulk between panels for seamless joints.
Tip: Leave a 1/8" expansion gap at edges when installing wood-based panels.
Peel-and-Stick Installation
Ideal for: Lightweight panels with pre-applied adhesive
Requires: Clean, primed surface and rubber roller
Step-by-Step
- Wipe the wall clean to remove dust and grease. Allow to dry fully.
- Measure and draw a level starting line.
- Peel off the adhesive backing from the first panel.
- Align carefully and press onto the wall, starting from one edge.
- Use a rubber roller to apply even pressure across the panel.
- Continue installing panels tightly edge-to-edge.
Tip: Avoid repositioning panels—adhesive bonds strongest on first contact.
Glue-On Installation
Ideal for: Panels without adhesive (solid PVC, composite, acoustic panels)
Requires: Construction adhesive or latex panel glue
Step-by-Step
- Clean the wall surface thoroughly.
- Apply adhesive in an “S” or zig-zag pattern on the back of the panel.
- Align the panel with guide marks and press firmly onto the wall.
- Use painter’s tape to hold panels in place if necessary.
- Repeat for remaining panels, ensuring level alignment and consistent spacing.
- Wipe away any adhesive squeeze-out with a damp cloth.
Tip: Allow adhesive to cure for 24–48 hours before applying pressure or weight
- Order Handling Time:
1–3 business days
- Transit Time:
14–22 business days after order placement
- Estimated Delivery Time:
15–25 business days
For full details, please refer to our Shipping Policy
We offer a 30-day return window. Simply contact our support team info@solincollective.com to initiate a return.
Claims submitted after this period may not be eligible for a refund or replacement.
Choose options
Safe payment on our website